Weeks 5 & 6: Fantastical Plant
- May 5, 2025
- 4 min read
Updated: Mar 1
After completing my concept and prop setup, I shifted focus to bringing my magical plant scene to life through lighting, animation, and refined materials. The goal was to create something "fantastical" in a realistic environment. For me, that was making a glowing flower that felt alive, but also gave a mystery as to what it is doing here. Below is my final render for this project.
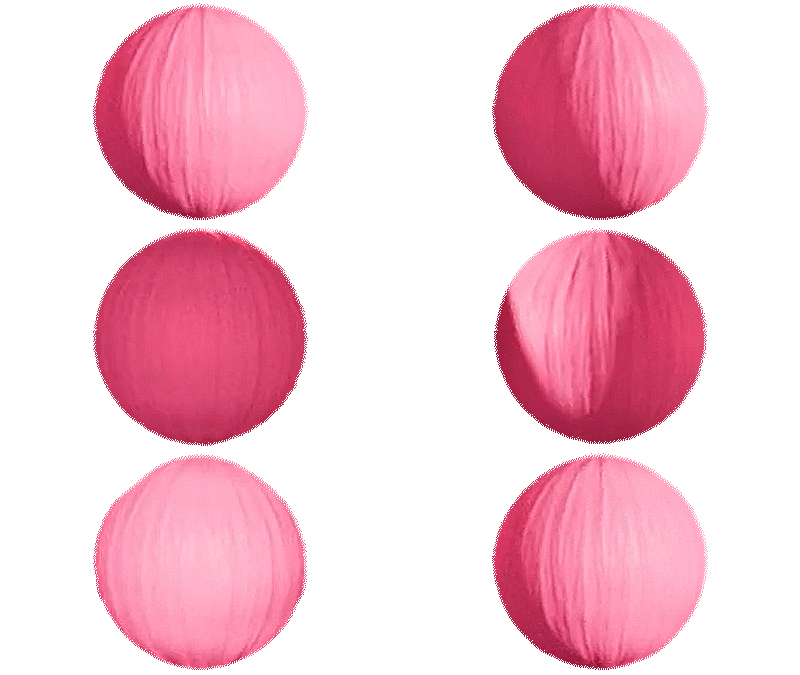
Material Quilt
To ensure material quality across all elements in my scene, I created another material quilt turntable, showcasing each shader applied to a sphere under consistent lighting. This helped me isolate and refine properties like specularity, reflection, and subsurface effects. It also allowed me to test material interactions before implementing them into my scene.
Flower Shader Breakdown: Building a Magical Glow
The flower is my "fantastical" centerpiece of this project, so its shader needed to feel both magical and believable. To achieve this, I used a VRayBlendMtl to combine a photo-based petal texture with a glowing light layer.


To simulate a pulsing glow that felt organic, I used a simple sine wave expression to drive the flower’s brightness intensity through a remapValue node:

The base intensity value is 0.4; it then fluctuates by ±0.3 over time using sin(time * 2), creating a smooth wave-like animation. This gives the flower a rhythmic glow, like it's breathing or radiating magical energy.
By driving this into the input of a ramp that controls the flower’s emission, I created a dynamic effect without having to keyframe each pulse.
It's fully procedural and easy to adjust just by tweaking the amplitude or frequency.
Magical Orbs: Enhancing the Flower's Energy
To support the flower’s breathing glow and make the scene feel alive, I implemented two types of sphere animations: one set rising from the soil like an exhale, and another slowly orbiting around the bloom. Both effects were driven by MEL expressions in Maya for full procedural control; no keyframes needed.
Orbital Sphere Motion: Expression Breakdown
The orbiting spheres were scripted to follow a circular path around the flower with soft vertical motion and scale pulsing. Each sphere uses a combination of sine and cosine functions to generate organic movement over time. Here's one of the expressions:
float $t = frame;
float $x = 0.15 * sin($t * 0.02 + 1.039);
float $z = 0.15 * cos($t * 0.02 + 1.039);
float $y = 0.5 + (sin($t * 0.05 + 1.039) * 0.1);
MagicSphere_1.translateX = $x;
MagicSphere_1.translateY = $y;
MagicSphere_1.translateZ = $z;
What it Does:
$t = frame; ensures that the spheres move according to the animation timeline.
Sin and Cos translate circular movement in X and Z space.
The offset (+ 1.039) ensures the spheres don't stack on each other.
The Y-axis is animated independently with sin($t * 0.05) to make the orb float up and down slightly, like it's hovering.
Soil-Based Motion: (Missing Script)
While I no longer have the exact script I used for the rising soil spheres, their animation followed a similar process: a time-based expression that moved them upward in a staggered, natural rhythm, mimicking a magical "exhale" from the flower's base.
The spheres were then slightly offset in time to prevent them from stacking directly on top of each other. For example, one might start rising at frame 1, the next at frame 6, another at frame 11, and so forth, creating a continuous, breath-like effect as the orbs emerged from the soil.


Spheres moving in time
To blend spheres with my plant smoothly, I used a VRayLightMtl on the spheres, using the same expression for the flower’s glow cycle. This made the orbs pulse in sync with the plant bloom, emphasizing the concept of the plant as a living, magical energy source radiating into the environment.
Camera Animation & Noise Revisions
As a final enhancement, I redesigned my camera's movement to appear more cinematic and deliberate. By modifying the focal length, depth of field, and animation path, the camera now smoothly leads the viewer into the scene, directing attention to the flower’s bloom. This is a significant improvement over my initial handheld-style camera, which became overly chaotic by the end.
During this process, render noise was one of the major technical issues. I tried various denoiser engines and VRay rendering settings to find a balance between keeping fine details and reducing noise.
I eventually realized that the problem was due to using the incorrect denoiser at the wrong location. Once I switched to the NVIDIA AI Denoiser on my college workstation, I managed to greatly reduce noise while preserving the flower’s details, although this resulted in longer render times.
Final Thoughts
This project allowed me to blend realism with fantasy. From developing shaders and expression-driven animation to refining camera movement and lighting, every part of this process helped me understand how to create a believable fantasy scene within a 3D environment.
Despite the challenges faced, each issue helped my understanding of V-Ray and Maya's capabilities.
Thank you for reading, and I'll see you in a few weeks!


